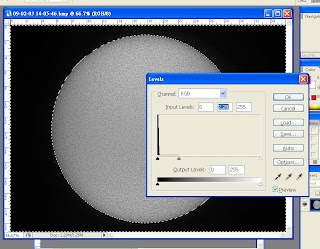
The first step is to bring out the prominences. Exposure time of surface detail and prominence is very different, we are talking about 1/500s or faster for a particular setup for surface detail, and with the same setup, the exposure time for prominence will be like 1/40s! However, if your camera is good enough, i.e. having good dynamic range, you can bring out the dim prominence captured when you're targeting surface detail. To do this, we selectively push the level of your exposure by using the magic wand tool:

Frankly, this kind of processing is somehow overdone. What I'm trying to say is that, image processing should not be done partially or else it should be considered as over processing. In the extreme case like you *draw* something on your photograph, it's a kind of selective processing. Anyway, for prominence and surface detail to appear at the same shot, you will need some selective processing, be it a combination of two exposures by layer masking, or similar techniques. So the above method I proposed is simplest and suitable for lazy guys like me.
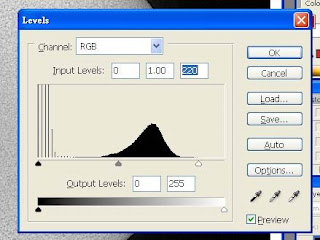
The next step is to adjust the level. There's nothing special about this, and you want to maximize the whole dynamic range of your image, so it's done like any other image, astronomical ones or even daily snapshots:

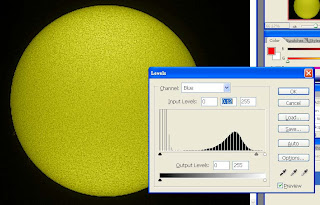
Next, we are going to make a false color shot. H-alpha imaging is monochromatic in nature. You got black and white. So the colors are all introduced later to make them more beautiful to our eyes. Here, I shall introduce a simple method in which you can make your solar image more colorful.
First, we will need to handle the Blue channel, I always set it like below:-

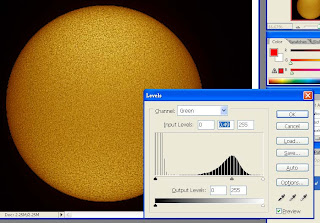
Second, we will deal with the Green channel, I always set it like below:-

Finally, the Red channel is not as important as you would think as you can see from the above image. Do whatever you would like. Finally, you can adjust the curve to suit your taste. I would suggest any one to have some eyepiece time so that you can judge what's the best way.
Lastly, crop your picture to cut out those unwanted black area. Done!
1 comment:
Reliable post...
Regards,
SBL Image masking service provider
Post a Comment